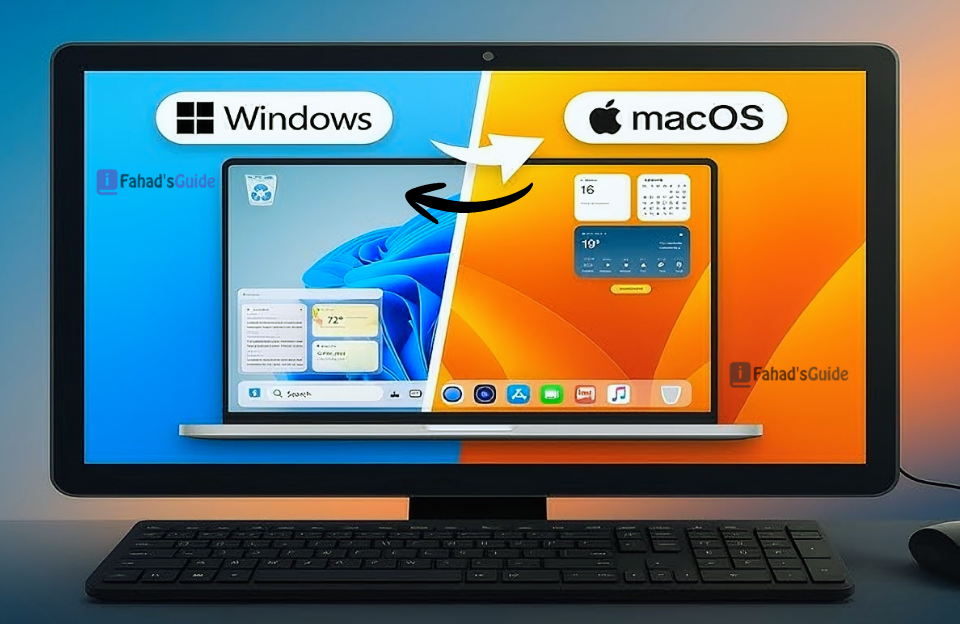
You’ve got a Mac, but you need Windows for that one program your job requires. Or maybe you’re a Windows user who’s curious about macOS but doesn’t want to buy a whole new machine. Either way, you’re wondering: can I actually run both operating systems on the same computer?
The short answer? Absolutely. I’ve been helping people set up dual-boot and virtualization systems for years, and it’s more accessible than ever. Whether you’re a developer who needs cross-platform testing, a designer switching between Final Cut and Adobe Suite, or just someone who wants the best of both worlds, this guide will walk you through your options.
Let’s break down exactly how to make macOS and Windows 10 play nice together and which method works best for your situation.
Understanding Your Options: Three Main Approaches
Before we dive into the technical setup, you need to understand that there are fundamentally three ways to run both operating systems:
- Dual-booting: means installing both operating systems separately on your hard drive. When you start your computer, you choose which one to boot into. You can only use one at a time, but each runs at full native speed.
- Virtualization: means running one operating system inside the other using software like Parallels, VMware, or VirtualBox. You can switch between them instantly without rebooting, but the virtualized OS runs slightly slower.
- The Hackintosh route: involves installing macOS on non-Apple hardware. This is technically possible but violates Apple’s license agreement and can be unstable. I’ll touch on it briefly, but I generally don’t recommend it for most users.
Your choice depends on what you prioritize: performance, convenience, or cost.
Option 1: Boot Camp (Running Windows on a Mac)
If you own a Mac and need Windows, Boot Camp is Apple’s official solution. It’s built right into macOS, completely free, and gives you native Windows performance.

What You’ll Need
First, check if your Mac supports Boot Camp. Most Intel-based Macs from 2012 onward work fine. Unfortunately, if you have one of Apple’s newer M1 or M2 Macs: Boot Camp isn’t available, Apple’s shift to ARM processors means you’ll need to use virtualization instead.
You’ll also need:
- At least 64GB of free storage (128GB recommended)
- A Windows 10 ISO file (download from Microsoft’s website)
- A USB flash drive with 16GB capacity
- About an hour of your time
The Setup Process
- Open Boot Camp Assistant from your Utilities folder. The software walks you through the process step-by-step, which is honestly pretty straightforward.
- First, you’ll partition your hard drive. This means dividing your storage into separate sections: one for macOS and one for Windows. I usually recommend giving Windows at least 100GB if you plan to install programs and games. Remember, you can’t easily resize these partitions later without wiping everything, so think carefully about how much space you’ll need.
- Boot Camp Assistant will download the necessary Windows support software automatically. This includes drivers that help Windows recognize your Mac’s hardware: trackpad gestures, keyboard functions, and all that good stuff.
- Next, the installer will restart your Mac and boot into the Windows installation process. Follow the prompts just like you would on any PC. When asked where to install Windows, select the partition labeled “BOOTCAMP.” Don’t accidentally select your macOS partition, or you’ll have a bad day.
After Windows installs, your Mac will restart into Windows. Install the Boot Camp drivers from the USB drive that was created earlier. These are crucial; without them, things like Wi-Fi, Bluetooth, and your trackpad won’t work properly.
Switching Between Operating Systems
Once everything’s set up, switching is simple. Restart your computer and hold down the Option key as it boots. You’ll see a screen letting you choose between macOS and Windows. Pick your operating system, and you’re good to go.
You can also set a default startup disk in System Preferences (macOS) or Boot Camp Control Panel (Windows) so your preferred OS loads automatically.
Option 2: Virtualization Software
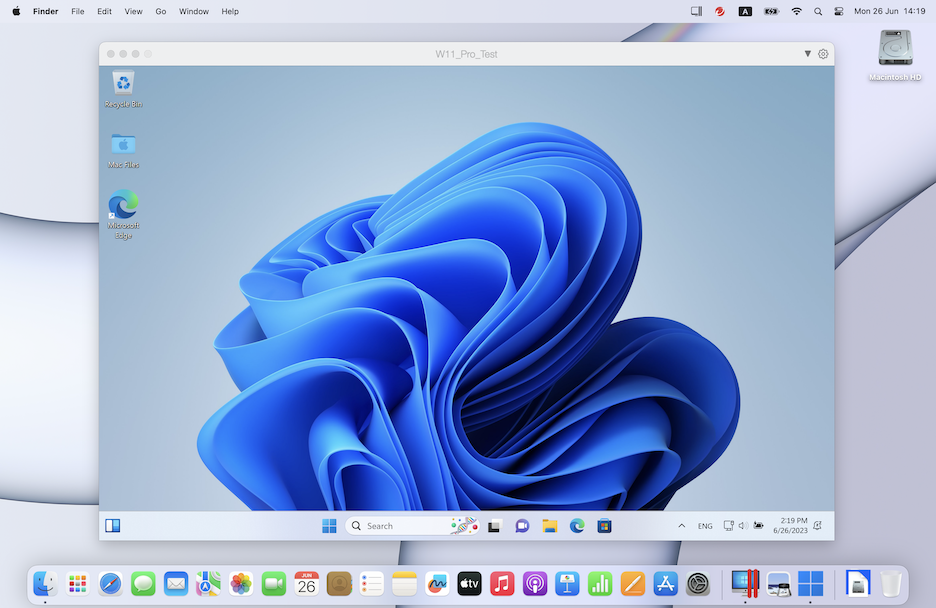
Virtualization lets you run Windows inside macOS (or vice versa) without rebooting. It’s like having a Windows computer running inside a window on your Mac desktop.
Popular Virtualization Options
- Parallels Desktop ($100/year) is the most polished option for Mac users. It’s fast, integrates beautifully with macOS, and lets you run Windows apps alongside Mac apps seamlessly. You can even set it up so Windows programs appear in your Mac’s Dock. For most people who don’t need extreme performance, this is the sweet spot.
- VMware Fusion ($200, or $149 for upgrades) is Parallels’ main competitor. It’s similarly powerful and slightly more popular with IT professionals and developers who need advanced networking features. The interface isn’t quite as elegant, but it’s rock-solid stable.
- VirtualBox is completely free and open-source. The catch? It’s noticeably slower and less user-friendly. If you’re on a tight budget or just experimenting, it works. But if you’re using this daily, the $100 for Parallels is worth every penny.
Setting Up a Virtual Machine
Let’s walk through the process using Parallels as an example, though the others are similar.
- Download and install Parallels Desktop from their website. Launch the program and select “Install Windows.” Parallels can download Windows 10 automatically, or you can point it to a Windows ISO file you’ve already downloaded.
- The software will ask how you plan to use Windows. Choose “Productivity” for office work, “Games” if you’re gaming, or “Development” for programming. This optimizes performance settings automatically.
- Allocate your resources carefully. Parallels will suggest defaults, but here’s what I’ve found works well: Give Windows at least 4GB of RAM (8GB if you have 16GB+ total), and at least 2 CPU cores. You can adjust these later if needed.
- The installation takes 20-30 minutes. Once complete, Windows appears in a window on your Mac desktop. You can run it fullscreen to simulate a dedicated Windows machine, or in windowed mode so you can drag files between operating systems.
Option 3: Running macOS on a Windows PC (The Hackintosh)
This is the opposite scenario: you have a Windows computer and want to install macOS on it.
Why This Is Complicated
Apple doesn’t want you doing this. Their operating system is designed exclusively for their hardware, and their license agreement explicitly prohibits installing macOS on non-Apple computers. That doesn’t make it illegal to try, but it does mean you’re on your own if things go wrong.
The technical challenges are significant. macOS expects specific hardware configurations. Your Wi-Fi card might not work. Your graphics card might not be recognized. Sleep mode might crash your system. Audio could be wonky. Getting everything running smoothly requires research, patience, and often some trial and error.
Which Method Should You Choose?
Here’s how I guide people based on their specific needs:
Choose Boot Camp if:
- You need maximum performance for gaming or professional software
- You’re okay with restarting to switch between operating systems
- You have an Intel-based Mac (not M1/M2)
- You want a free, officially supported solution
Choose virtualization if:
- You need to switch between operating systems frequently
- Your Windows needs are moderate (office work, web development, light design)
- You want to access files from both OSes simultaneously
- You’re willing to spend $100-200 for convenience
Choose Hackintosh if:
- You enjoy technical challenges and troubleshooting
- You already own powerful Windows hardware
- You’re comfortable with potential instability
- You understand you won’t get Apple support
Storage Considerations and File Sharing
One thing people often overlook: how will you access files across both operating systems?
With Boot Camp, your Mac can read your Windows partition, but Windows can’t write to macOS partitions by default. You’ll need third-party software like Paragon NTFS or to use a shared FAT32 partition for files you need to access from both sides.
Virtualization makes this easier. Most VM software lets you designate shared folders that both operating systems can access freely. I usually create a “Shared” folder on my Mac desktop that appears automatically in Windows.
Cloud storage services like Dropbox, Google Drive, or OneDrive work on both platforms and eliminate most file-sharing headaches. This is honestly the solution I recommend most often.
Common Problems and Solutions
Over the years, I’ve seen the same issues pop up repeatedly. Here are the quick fixes:
“Windows is running really slowly in my VM.” You probably haven’t allocated enough RAM. Shut down the VM, go into settings, and bump up the memory allocation to at least 4GB. Also check that you don’t have too many applications open on both operating systems simultaneously.
“My Mac’s trackpad doesn’t work right in Windows.” Install or reinstall the Boot Camp drivers. These include the necessary touchpad drivers for full gesture support.
“I’m running out of space on my Boot Camp partition.” This is tricky. You can’t easily resize partitions without backing everything up, deleting them, and starting over. Your best bet is using external storage or cloud services to offload large files.
“Audio isn’t working properly.” This is usually a driver issue. Check for updates to your Boot Camp support software or virtualization program. Sometimes a simple restart of the Windows VM fixes audio glitches.
Conclusion
Running macOS and Windows on the same computer isn’t just possible; it’s practical. Thousands of people do it every day for work, creativity, and gaming. If you’re a Mac user who occasionally needs Windows, start with Parallels Desktop. The convenience and ease of use make it the best option for most people. Only go with Boot Camp if you genuinely need that extra performance boost. If you’re a Windows user curious about macOS, I’d suggest buying used Apple hardware over building a Hackintosh. The stability and reliability are worth the investment.
Whichever route you choose, take your time with the setup process. Follow the instructions carefully, back up your important data before you start, and don’t panic if something doesn’t work immediately. With a bit of patience, you’ll have both operating systems running smoothly and wonder how you ever lived without the flexibility.
Got questions about your specific setup? Drop them in the comments.